Today’s online visitors want quick, helpful answers. Adding a conversational AI tool to your site meets this need. It changes how you engage with and support customers.
Many organisations find the variety of technical options overwhelming. This is why a clear plan for website chatbot integration is key.
Our guide makes things simpler. We’ll cover the main methods. From fully-managed services that need little effort to custom development for unique needs.
The idea becomes more practical when you connect it to build a chatbot with google dialogflow in a real conversational-AI workflow.
This expert overview aims to clear up confusion. It gives you the basic knowledge to pick and use an effective solution with confidence.
The Compelling Case for Website Chatbots
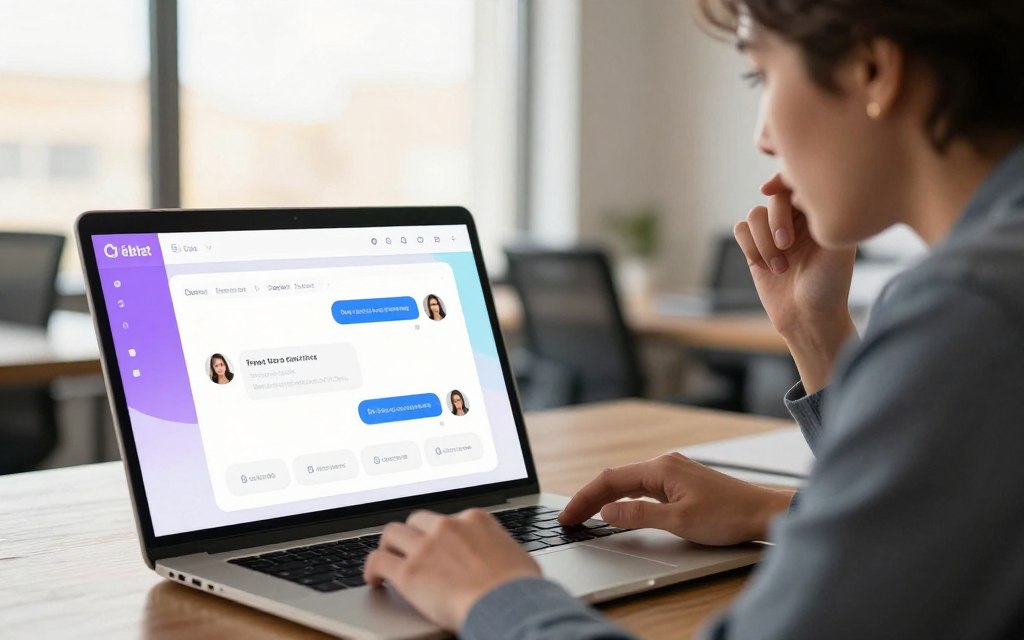
Adding a chatbot to your website changes how it works. It turns a static site into a live, 24/7 chat service. This makes visitors more engaged, moving from just reading to having real conversations.
Transforming User Engagement and Support
Today’s users want quick, app-like interactions. A website chatbot gives them just that, making it easy to talk to your site. This cuts down on the stress of filling out long forms, encouraging more people to chat.
Chatbots are great for support because they’re always there. They answer questions fast, turning a long wait into a quick fix. This makes the user’s journey smoother from the start.
They also help qualify leads better than old methods. Chatbots can collect important info and guide users to the right places or people. This makes it easier for visitors to find what they need and move forward.
Key advantages include:
- Always-On Availability: Works 24/7 without stopping.
- Instant Response: No waiting for simple questions.
- Higher Engagement: Makes talking to your site easy and fun.
- Improved Lead Capture: Figures out what visitors are interested in during chat.
In the end, chatbots make your website more helpful and effective. They turn your digital front door into a welcoming space for visitors.
Pre-Integration: Defining Goals and Audience
Before picking a platform, the groundwork is laid. This planning phase is key. It turns a simple tool into a powerful asset for your business.
Without this planning, your chatbot might confuse visitors or not add value. A solid plan shapes every choice, including your chatbot platform selection.
Identifying Your Chatbot’s Primary Functions
First, decide what your bot’s main job is. Does it aim to get leads, offer quick support, or boost sales? Many bots do a bit of everything.
Look at what your customers usually ask and what problems they face. This helps set clear goals. For instance, you might want to cut down on support tickets by 30% or automatically qualify sales leads.
Also, figure out when to pass on complex issues to a human. This ensures some problems get solved right away.
Understanding Your Visitors’ Needs
Your chatbot needs to meet different visitors’ needs. A person looking at prices is different from someone reading a blog. It’s vital to adjust the chatbot’s actions for these situations.
Study when your site gets the most visitors and how they move around. What questions do they have at each step? Knowing this lets you offer timely, useful answers.
By really getting to know what visitors need, your chatbot can turn casual browsing into meaningful interactions. This makes the next step—selecting a platform—much easier and more effective.
Choosing the Right Chatbot Platform for Your Needs
Chatbot platforms vary from simple to advanced AI systems. Your choice should meet your goals, technical skills, and budget. There are three main types: fully-managed services, low-code builders, and custom AI chatbot development using APIs.
Comparison of Popular Platforms: Tidio, Drift, Intercom, Dialogflow
Looking at specific providers helps you understand your options. This comparison can help you focus on what you need.
| Platform | Cost Model | Key Features | Best For |
|---|---|---|---|
| Tidio | Freemium, tiered subscriptions | Live chat + bots, visual builder, e-commerce integrations | Small businesses seeking an all-in-one, user-friendly solution |
| Drift | Higher-tier enterprise pricing | Conversational marketing, lead qualification, sales pipelines | Marketing and sales teams aiming to automate lead generation |
| Intercom | Premium, per-seat pricing | Customer support automation, product tours, extensive CRM | Companies prioritising integrated customer support and engagement |
| Dialogflow | Pay-as-you-go API usage | Advanced natural language processing (NLP), deep customisation | Developers building complex, custom conversational AI experiences |
Criteria for Selection: Cost, Features, and Complexity
Don’t just look at monthly fees. Consider the total cost, including hidden fees for extra agents or API calls. Also, check if the platform offers white-labelling and good technical support for your brand.
Make sure the platform has the features you need. It should integrate well with your current tech, like CRM or helpdesk. Think about how complex the platform is and if your team can handle it.
Rule-Based Builders vs. AI-Driven Solutions
Choosing between rule-based and AI-driven bots is key. Rule-based builders use simple logic for common questions. Crisp is a good example, being easy to use.
AI chatbots, on the other hand, use machine learning for more complex conversations. They offer a better user experience but need more data and training. This can be more expensive.
Fully-managed services, like Crescendo, are a hands-off option. They’re great for teams that need advanced AI chatbot features but lack technical skills.
Essential Preparation Before You Begin Integration
Before you start coding, getting ready is key for a chatbot to work well. This step is vital for a smooth setup. It makes sure your customer support chatbot fits your brand and tech setup.
Gathering Access Credentials and Content
First, gather all digital stuff and info you need. You’ll need admin logins for your website and the chatbot platform.
Then, collect your brand’s visual and voice details. This includes:
- Official logos in correct formats.
- Brand colour hex codes.
- A defined tone of voice document for conversational style.
Lastly, gather the knowledge your bot will use. Collect product catalogues, support FAQs, shipping policies, and contact details. This content is the heart of your bot’s helpful answers.
Technical Prerequisites and Considerations
On the tech side, check if your website works with chatbots. Most use a JavaScript snippet, so make sure your site template supports it.
Make sure you have the right access to your site’s backend. This could be a code editor or the ‘Custom HTML’ area in your CMS.
Critically, talk to your IT or hosting provider about any script restrictions. Firewalls or strict security policies can stop a chatbot widget from showing up, causing problems at the last minute.
How to Add a Chatbot in Website: Core Integration Pathways
Before we get into the technical steps, it’s important to understand the main ways to add a chatbot. Your choice affects how easy it is, how much control you have, and how fast you can set it up. There are three main ways: using a fully-managed service, a low-code builder, or creating a custom solution.
The method you choose depends on your website’s technology and your team’s skills. We’ll look at four practical methods, all falling under these main paths.
Overview of the Most Common Methods
For many, the easiest way is using a platform-specific plugin or app. For example, WordPress has plugins that make integration easy. Shopify also has apps in its store.
For sites on Wix or Squarespace, or custom-coded sites, the embed code method is best. You just copy a JavaScript snippet from your chatbot provider and paste it into your site’s header. This is what an HTML chatbot embed is all about.
The last option is manual integration with custom HTML/JavaScript. This gives you the most flexibility but needs in-house development skills. It’s best for complex, custom projects.
To sum up, the four practical methods you’ll use fall into these categories:
| Integration Method | Best For Website Type | Core Technology | Typical Effort Level |
|---|---|---|---|
| Plugin-Based Integration | WordPress, other major CMS | Pre-built plugin | Low (No-code) |
| App-Based Integration | Shopify, BigCommerce | Platform app store | Low (No-code) |
| Embed Code on Builders | Wix, Squarespace, Weebly | Widget embed snippet | Low to Medium |
| Manual HTML/JavaScript | Custom-coded websites | Direct code insertion | High (Developer) |
Assessing Your Website’s Technology
Finding your starting point is easy. Just ask yourself: what technology is my website built on? Check your admin panel or talk to your web developer.
If your URL has `/wp-admin`, you’re on WordPress. If you manage products in a Shopify dashboard, that’s your platform. Sites on Wix or Squarespace use their own editors. Custom sites give you direct access to the source code.
This check points you to the right pathway. A WordPress site means plugins. Shopify stores use apps. Custom sites and many builders use the universal HTML chatbot embed code for easy integration.
Integration Method 1: Utilising a WordPress Plugin
Adding a chatbot to WordPress sites is easy thanks to plugins. You don’t need much technical know-how. Just pick, install, and set up a WordPress chatbot plugin.
Step 1: Researching and Selecting a Plugin
Start by going to the ‘Plugins’ section in your WordPress dashboard. Click ‘Add New’ and search for chat tools. Use keywords like “live chat” or “AI chatbot” to find many options.
When looking at plugins, consider a few things:
- Ratings and Reviews: High scores and positive feedback mean it’s reliable.
- Active Installations: A lot of installs show it’s stable and well-supported.
- Compatibility: Make sure it works with your WordPress version.
- Service Integration: Check if it connects to your chosen chatbot service (like Tidio).
Picking a well-supported WordPress chatbot plugin is key for a smooth setup.

Step 2: Installing and Activating the Plugin
Choose your plugin and click ‘Install Now’. WordPress will download and install it for you. After it’s installed, click ‘Activate’ to turn it on.
Clicking ‘Activate’ lets you use the plugin’s settings. You’ll find them in your WordPress admin area, ready for the next step.
Step 3: Connecting to Your Chatbot Service Account
Many plugins connect WordPress to external chatbot services. After activating, find the plugin’s menu in your dashboard.
In the plugin settings, you’ll find a way to connect to your service account. For example, with Typebot, you log in here. The plugin might ask for an embed code or API credentials.
Step 4: Customising Widget Design and Trigger Rules
With the connection set up, you can customise the chatbot. Go to the design settings in the plugin dashboard.
Here, you can change the chatbot’s look to match your site:
- Primary colour scheme and button style
- Chat window size and position
- Avatar image and welcome message
Setting up trigger rules is also key. These rules decide when the chat widget shows up. Smart triggers keep the chatbot from being too pushy. You can set rules like:
- Exit-intent: Shows when a user is about to leave the page.
- Time-delay: Appears after a visitor stays on the page for a while.
- Scroll-depth: Triggers when a user scrolls a certain amount down a page.
Tip: Optimal Placement for Visibility and Engagement
The best spot for the chat widget is the bottom-right corner. It’s easy to see without blocking important content. But, you can try other spots too. See what works best for your visitors.
Integration Method 2: Adding a Chatbot to a Shopify Store
The Shopify App Store is a great place to find chatbot solutions for online shops. It’s easy to add a Shopify chatbot app here. These tools help boost sales and improve customer service.
Step 1: Browsing the Shopify App Store
Start by going to the Shopify App Store from your admin dashboard. Use the search bar and filters to find chatbot apps. Look for keywords like “live chat,” “AI assistant,” or “customer support bot.”
Read each app’s details carefully. Check user ratings, recent reviews, and feature lists. Choose an app that fits your store’s needs, whether it’s small or complex.
Step 2: Installing and Configuring the Chatbot App
After picking an app, click “Add app” and confirm. You’ll need to give the app permission to access your store’s data. This lets the chatbot offer personal help.
Once installed, go to the app’s settings. Here, you can change the chat widget’s look to match your store. Set up basic rules, like when the chat appears and its first message. This dashboard is where you’ll do all your setup.
Step 3: Aligning Chatbot Flows with E-commerce Goals
The real strength of a Shopify chatbot app is in setting up flows that help your business. Go beyond simple greetings and create dialogues for common questions.
Focus on flows for order tracking, shipping updates, and return policy info. Use product recommendations based on browsing history. Also, set up automated sequences for cart recovery, reminding customers to complete their purchase.
This way, your chatbot becomes a valuable sales and support tool.
| App Name | Core Strength | AI Capabilities | Key E-commerce Feature |
|---|---|---|---|
| Tidio | User-friendly builder | Basic AI responses | Visual cart recovery campaigns |
| Gorgias | Unified helpdesk | Ticket automation | Automatic order lookup & return initiation |
| Re:amaze | Customer engagement suite | Conversational AI | Integrated marketing campaigns |
Integration Method 3: Embedding on Website Builders (Wix, Squarespace)
Adding a chatbot to your Wix or Squarespace site makes lead generation easy. These platforms are great for those who want simplicity and design control. You can choose between using a native widget or embedding code for more flexibility.
Step 1: Using Native Chat Widgets or Apps
Start by checking your website builder’s features or app store. Many platforms offer chat functionality or partner with specific providers.
For example, Wix has ‘Wix Chat’ and Squarespace has ‘Squarespace Chat’. These are often free and easy to install. They work well with your site and are easy to set up.
But, native apps might lack advanced features. If you need more, you might have to use the manual embed method.
Step 2: The Manual Embed Code Approach
For more control and advanced features, use the manual code method. Most chatbot platforms, like Tidio or Drift, provide a JavaScript snippet for embedding.
Copy the code from your chatbot provider’s dashboard and paste it into your website builder. This starts conversations that can capture customer details.
The exact spot for the code depends on your platform:
- Wix: Use the ‘Embed HTML’ element from the editor’s menu, often found under ‘More’.
- Squarespace: Add a ‘Code Block’ to the page where you want the chat to appear.
- Webflow: Insert an ‘Embed’ element into your page’s design and paste the code there.
This method keeps your chatbot’s full functionality. It allows for complex dialogues and data collection for sales.
Example: Adding a Code Snippet in Wix
Here’s a common scenario. After setting up your bot, you get a unique embed code.
- In your Wix editor, go to the page for the chat.
- From the left-hand menu, click ‘Add’ (+) and select ‘More’.
- Choose the ‘Embed HTML’ element and drag it onto your page. A box will appear.
- Click ‘Enter Code’ on the box’s settings panel. Paste your JavaScript snippet into this field.
- Adjust the element’s position and size. The chat widget will now appear live on your site, ready to engage visitors and generate leads.
Remember to always publish your site after making these changes. This manual embed process, while involving a few more steps, future-proofs your setup and connects you to powerful external lead generation chatbot tools.
Integration Method 4: Manual Integration via HTML/JavaScript
If plugins or apps don’t work, adding a chatbot script manually is a good choice. This method is best for custom sites or places where you can edit HTML. It lets you control where and how the chatbot starts.
Step 1: Acquiring the Embed Code from Your Provider
First, get the JavaScript snippet from your chatbot service. Log in to your chatbot service, like Tidio, Drift, or Dialogflow. Go to the settings or installation section. There, you’ll find the embed code, often called “Installation,” “Widget Code,” or “Snippet.”
This code is special for your account. It usually has a <script> tag linking to an external file. Copy the whole block to your clipboard. Make sure not to change any part of this code.
Step 2: Accessing Your Website’s Source Code
Next, edit your website’s core files. You can do this through your hosting provider’s file manager, an FTP client like FileZilla, or directly in your code editor if you’re working locally.
Find the root directory and look for the main HTML file. This file is usually named index.html, default.html, or home.html. This is the file that loads when visitors come to your homepage. You’ll add the chatbot code here.
Step 3: Inserting the Snippet Correctly
Open the HTML file in a text editor. Find the right place to paste your copied snippet. Where you put it is important for how well it works.
Common Placement: Before the Closing </body> Tag
The best place is just before the closing </body> tag. Putting the code here makes sure the chatbot loads after the main content. This helps the page load faster.
Just paste the code on a new line before the </body> tag. Save the file and upload it back to your server if you edited it locally.
Step 4: Validating the Implementation
After saving, check if it works. Open your website in a new incognito or private browser window. The chatbot widget should appear in the bottom corner.
Test it by opening the chat interface, saying hello, and sending a message. This shows the chatbot is working right.
Warning: Avoiding Conflicts with Existing Scripts
It’s important to check for JavaScript conflicts. If the widget doesn’t show up or breaks other site features, there’s a conflict. This happens when the new chatbot code clashes with other JavaScript on your page.
To fix it, disable other third-party scripts one by one. This helps find the problem. If you’re stuck, ask your chatbot provider’s support or a developer for help. Making sure it works right is key for a good user experience.
Configuring, Training, and Personalising Your Chatbot
Now that your chatbot is live, it’s time to make it your own. This step turns a simple tool into a valuable asset for your brand. It greatly affects how happy your users are and how well they convert.
To succeed, focus on three main tasks. Design smart conversations, create helpful automated chats, and give your AI the right data.
Building Effective Conversation Dialogues
Most platforms offer a visual builder for dialogue. This tool lets you create a flowchart for your chatbot’s conversations. You decide what the bot says and what options it offers to users.
The aim is to predict what users might ask and guide them quickly to a solution. For a rule-based bot, this means setting up clear paths for decisions.
- Start with frequent queries: Create flows for common questions like booking demos or checking order status.
- Offer clear choices: Use buttons for “Talk to Sales” or “View Support Articles” to keep the conversation on track.
- Plan for the unknown: Always have a friendly fallback response. This should apologise and offer an alternative, like submitting an email or talking to a human.

Setting Up Automated Greetings and Responses
Your chatbot’s first greeting is key. A generic “Hello, how can I help?” often gets ignored. Instead, create a welcome message that matches the page the visitor is on.
Use variables to make greetings more personal. Many bots can insert the visitor’s name or reference the product page they’re viewing. Automated answers for common questions should be short and to the point. Quick-reply buttons for “Download Brochure” or “Schedule a Call” can grab leads fast.
Leveraging AI Training Features for Better Accuracy
For AI chatbots, it’s all about training. You teach the bot by uploading your company’s knowledge. This is vital for getting accurate, brand-specific answers.
Begin by uploading foundational documents:
- Your website’s content and blog posts.
- Product manuals or specification sheets in PDF format.
- An organised list of FAQs from your support team.
Next, write specific Q&A pairs. These teach the bot precise answers to detailed questions it might not get from documents alone. Use the system prompt feature to guide the bot on its tone, style, and limits.
For example, you might write: “You are a helpful and professional support assistant for [Company Name]. Always prioritise accuracy. If unsure, admit it and offer to find the answer.”
Thorough training reduces errors and lays a solid foundation for chatbot testing before launch. It ensures your AI assistant truly understands your business.
Launching, Testing, and Analysing Performance
Getting a chatbot to work is just the start. Testing and analysis are key to making it valuable. This ensures your chatbot meets your users’ needs as they change.
Conducting Complete User Acceptance Testing
Before you go live, do thorough User Acceptance Testing (UAT). Real people test the chatbot in real-life situations. Make sure it works well on all devices and browsers.
Test it on slow networks to see how it handles delays. Also, check if it’s accessible for people with disabilities. This step finds bugs and issues that internal tests might miss.
Key Metrics to Watch Post-Launch
After it’s live, focus on measuring its success. It’s important to track the right chatbot performance metrics. Key ones include:
- Resolution Rate: How often the chatbot solves a problem without needing a human.
- Customer Satisfaction (CSAT): What users say in surveys after talking to the chatbot.
- Deflection Rate: How many questions the bot answers, helping your team handle fewer tickets.
- Conversation Volume: How often people use the chatbot and when they do it most.
Looking at this data helps see if your chatbot is doing its job.
Strategies for Ongoing Betterment
A chatbot needs regular updates to stay useful. Continuous improvement is key for success. Check chat logs to find common problems or areas where users get stuck.
Look for trends in where users ask for human help. Use this info to make the chatbot better. This ongoing effort makes your chatbot more useful and efficient over time.
Realising Your Chatbot’s Full Potential
Adding interactive support to your website is a journey. It starts with setting goals and ends with launching a live assistant. The best method balances your technical skills with your business goals.
A well-implemented assistant changes how users interact with your site. It gives instant answers and works 24/7.
The true measure of success is a strong chatbot ROI. This return shows in lower costs, more sales, and happier customers. Platforms like Quidget help you build an AI assistant with your website content without coding.
Start your integration process. Choose a path that fits your site, set up the dialogue, and go live. You will unlock new levels of service and efficiency for your visitors.
FAQ
What are the main benefits of adding a chatbot to my website?
A chatbot turns your website into a place where you can talk to it. It gives users the instant help they want, 24/7. This makes your website better for users and helps your team focus on harder tasks.
How do I decide what my chatbot should actually do?
Start by looking at what your customers usually ask. Then, figure out what problems they face. Knowing what users want on different pages helps your chatbot help them better.
What’s the difference between a rule-based chatbot and an AI-powered one?
Rule-based chatbots follow set paths and are good for simple questions. AI chatbots understand different ways of asking and learn from users. Choose based on how complex your questions are and how much you can train the AI.
How much does it typically cost to add a chatbot?
Prices vary a lot. Some services like Intercom cost a monthly fee. Others, like Tidio, might be free but charge for extra features. Building a custom AI is the most expensive.
What is the easiest way to add a chatbot to my WordPress site?
For WordPress, use a plugin. Look in the WordPress plugin repository for options like Tidio. After installing, connect it to your account and set it up from your dashboard.
Can I add a chatbot to my Shopify store without coding?
Yes, you can. Use the Shopify App Store to find chatbot apps like Tidio. Install them and set them up without coding.
How do I embed a chatbot on a website builder like Wix or Squarespace?
Website builders have two ways to add chatbots. Look for native apps or use the manual embed method. This involves copying and pasting a JavaScript snippet into your site’s settings.
What technical access do I need for a manual HTML/JavaScript integration?
For custom sites, you need to edit your website’s source files. Use FTP or your hosting provider’s file manager. Make sure your hosting allows third-party scripts and insert the code before the `</body>` tag.
How do I “train” an AI chatbot to answer questions about my business?
To train an AI chatbot, give it your company’s knowledge. Upload documents, provide a sitemap, and create a Q&A library. The AI learns from this data. Keep updating it to improve over time.
What should I check before going live with my new chatbot?
Do thorough testing before launching. Test on different devices and browsers. Make sure the chatbot works well and looks good on your site. Also, tell your support team about the launch.

 By
By